Command Line Interface
Running Geneious Prime operations from the command line
In Geneious Prime 2022 onwards, you can run Geneious operations from the command line.
To use the command line interface (CLI), you must have a licensed copy of Geneious installed on the machine. Your license must have been activated either in the GUI interface, or by configuring the geneious.properties file prior to using the CLI. You must also install any plugins you wish to use via the Plugins menu in the GUI interface.
On Windows and Linux, no further configuration is required to run the CLI after installation of Geneious, just open the Command Prompt or Terminal and type geneious to run it.
On macOS you must create symlinks yourself so that the geneious command can be run from any directory in the Terminal.
To do this, use the following command:
sudo ln -sf /Applications/Geneious Prime.app/Contents/Resources/app/resources/geneious /usr/local/bin
(this assumes Geneious is installed in the default location in Applications)
Note that sudo (admin) privileges are required to create the symlink. However once this is created, the geneious CLI can be run by non-admin users.
Running operations in the CLI
Geneious operations in the CLI follow the basic format:
geneious -i <input_file_name> –operation <operation_name> <-options> -o <output_file_name>
To see all available operations, type
geneious –-list (add –-filter <operation type> to filter the list on specific types of operations)
To see all options for a given operation, type
geneious –-options-for <operation> (add –advanced to see advanced options)
To see some examples of how to use the CLI, type
geneious –-examples
To see all available commands and some examples of how to set options, type
geneious –-advanced
Using files from your local or shared database with the CLI
From Geneious Prime 2022.2 onwards, the command line interface can be used directly on files in your Geneious database.
Note that in prior versions, files for input to the CLI needed to be exported from the Geneious database so they were stored as files on your drive.
To use documents from your local or shared database as input to a CLI command, add the name of the database followed by a :, and then the path to the file. The local database is always called Local.
For example, to use a document from the local database as input use:
--input "Local:folder/folder/document"
To use a document from a Shared database use:
--input "my_shared_database:folder/folder/document"
(where my_shared_database is your Shared Database name, and folder/folder/document is the path to your file in Geneious)
The CLI supports using a mixture of documents from Local databases, Shared databases and the file system all at once. Please be aware the database names are case-sensitive and that any paths containing spaces will need to be surrounded by quotes.
Example:
This example shows a command for running Map to Reference using a reference sequence from a local Geneious database, with reads input from disk and outputting the result into a shared database.
geneious --input "LOCAL:MyProject/Reference" "C:\Users\thoma\Downloads\Sequence1.fastq" --operation Map_to_Reference --output "postgres_geneious_database:MyProject/MapToRef_results"
This command contains:
- 2 inputs, the first is a reference sequence from the local database (
LOCAL:MyProject/Reference) - the sequence file is called "Reference" and it is in a folder called MyProject. The second input is a sequence from the file system ("C:\Users\thoma\Downloads\Sequence1.fastq"). The first input is always used as the reference. - The operation
Map_to_Reference - The output into a Shared Database (
postgres_geneious_database:MyProject/MapToRef_results) - Note that
--inputand-i, and--outputand-ocan be used interchangeably
Using the CLI to import/export files from your Geneious database to the file system
You can also use the command line interface to push files from your file system into your local or shared database, or to pull or export files from the shared or local database to your file system. This uses only the input and output commands without any operation.
For example, to push a file from the file system into a shared database, use:
geneious --input "C:\Users\thoma\Downloads\sequences.fastq" --output postgres_geneious_database:MyProject/Sequences
To export a file from the shared database into the file system, use:
geneious --input "postgres_geneious_database:Plasmids/plasmid 1" --output "C:\Users\thoma\Downloads\plasmid 1.fasta"
Limitations
- The CLI cannot be used with either Local or Shared Databases if the GUI is running. This is because Geneious has built in safety measures which prevent more than 1 instance of Geneious accessing your database at once.
- Any Shared Database that you want to use must be configured in the GUI and set to auto-connect on start up.
- You can’t specify whole folders of documents, each document has to be specified separately.
Configuring an options profile to automate setting options
Using an option profile file allows you to preset the options you want to use in Geneious, and then apply them when running an operation in the command line interface.
For example, if you want to specify particular parameters for de novo assembly but do not want to enter each one in the command line, you can set it up in the GUI interface and generate an options profile file to use in the command line.
To do this, open the operation settings in the GUI interface for Geneious, and set any parameters that you wish to change from the defaults. Click the settings cog at the bottom left of the window and go Save current settings. Give your profile a name.
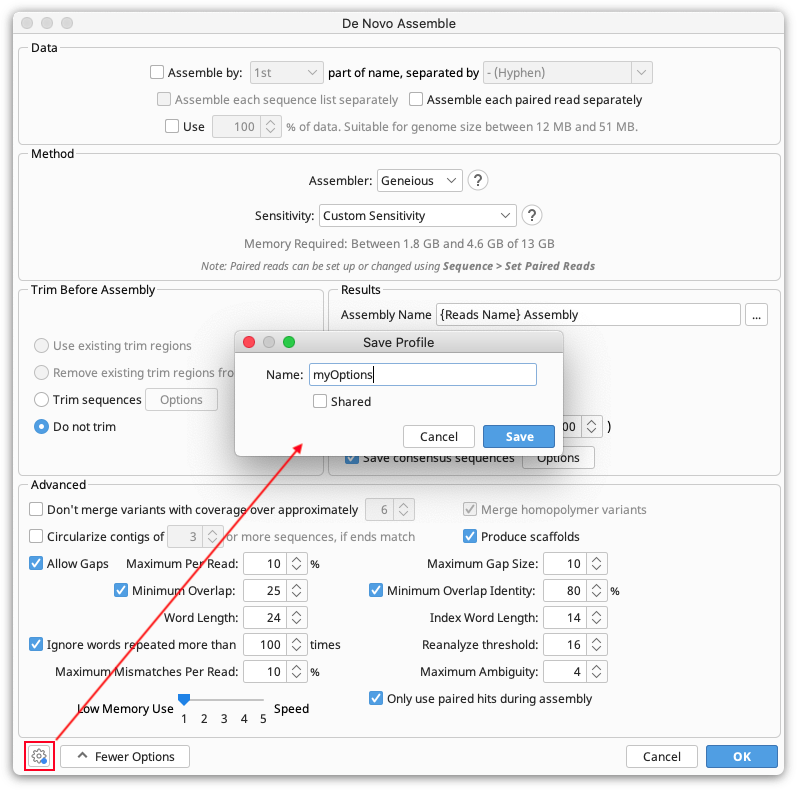
Then click the Settings cog again and go Load Profile → Manage Profiles. Select your profile and click Export to create an options profile file. Save this to your drive.
You can then call this file in the command line using the -x option. Note that you must include the full path to the file if you have saved it in a subfolder in your home directory. It is not necessary to specify the operation when using an options profile file, as this is set in the profile.
For example:
geneious -i inputfile.geneious -x myoptions.optionprofile -o outputfile.geneious
Running workflows from the CLI
Workflows configured in the GUI interface can be exported and run in the command line in a similar way to the options profile file.
First, set up your workflow within Geneious using the "Manage Workflows" tool. Then click the Export option to export it to a file.
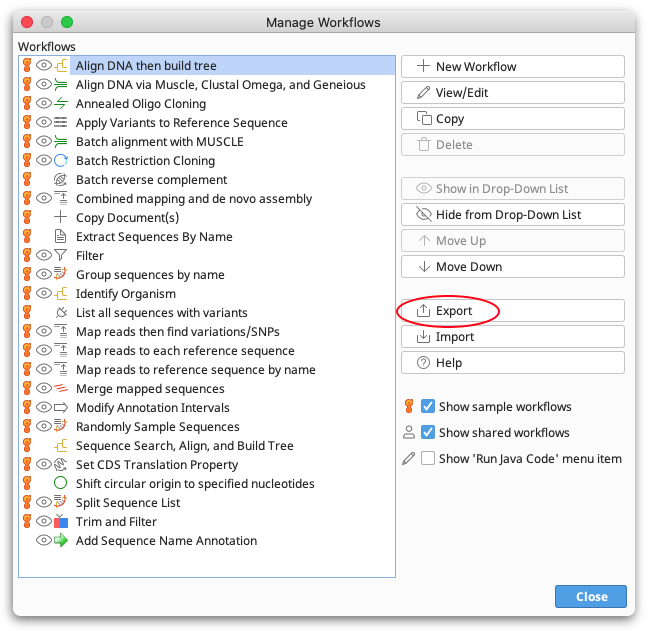
You can then call this file in the command line using the option -w workflow_name.geneiousWorkflow.
For example
geneious -i inputfile.geneious -w myworkflow.geneiousWorkflow -o outputfile.geneious
Note that if there are spaces in the workflow name, it should be enclosed in quotes ("my workflow name.geneiousWorkflow”).
Limitations
The command line interface currently has the following limitations:
-
The content of dialog windows that would normally show in Geneious may not be visible in the command line (this may include operations that return no result)
-
The name of the file output from the CLI may not necessarily be the same as the name of the sequence document within the file that is displayed when imported into Geneious.
The command line interface is under active development. If you would like to see additional functionality or have any comments regarding it, please contact support.