Geneious Cloud
Geneious Cloud workspace is included with all the new subscriptions purchased from 21st March 2024 onwards. Geneious Cloud provides secure cloud data storage, accessable directly from the Geneious Prime desktop application, allowing users to access their data from different computers using their Geneious Prime My Account login. Once logged in, data stored in the Geneious Cloud is available under the Cloud icon in the Sources panel. Users on a Teams subscription have additional access to Shared Workspace (see below)
Using Geneious Cloud
You will need an active Personal or Teams subscription for Geneious Prime, along with My Account to be able to log in and use Geneious Cloud.
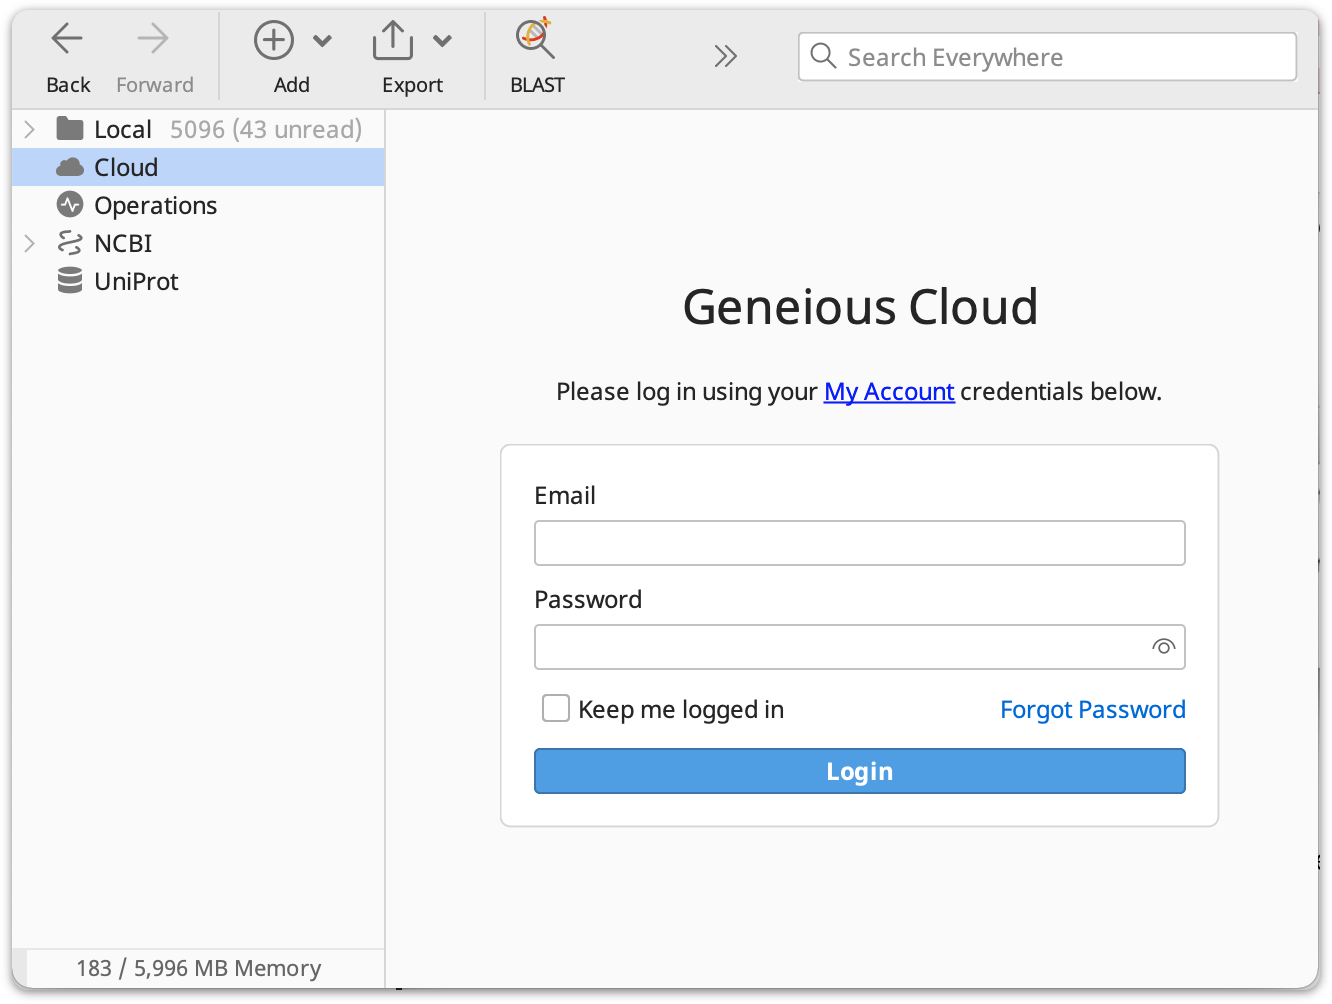
If you already have a Geneious Prime My Account you can Login with this email and password to start using Geneious Cloud.
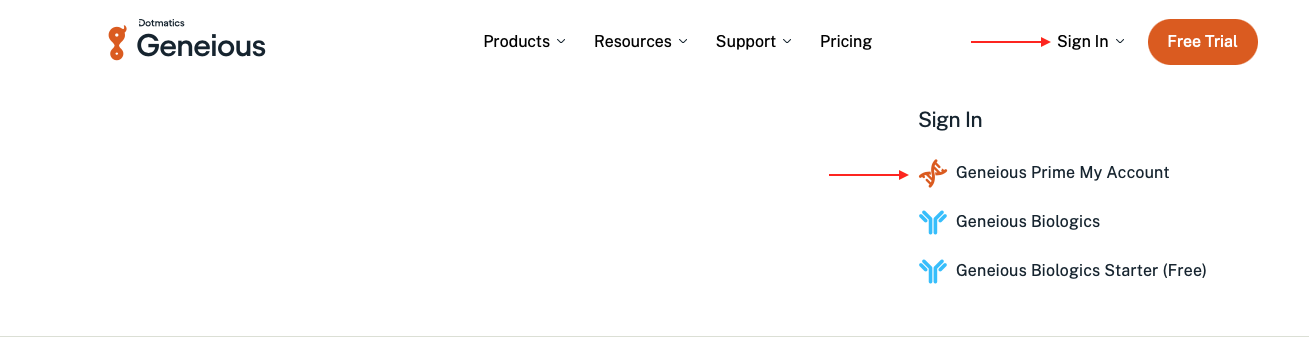
If you do not have a MyAccount setup, Create a New Account from the Geneious Prime My Account Page. You can find this page from "Sign In" on the Geneious.com website:
Once signed up, you can login and access Geneious Cloud from Geneious Prime desktop application. You can move your files to the cloud and run operations on the data in Geneious Cloud in the same way as from your local database. However, please note that the analysis is being performed locally on your computer. Therefore, you still require enough local storage to temporarily store and analyze this data locally.
Shared Cloud Workspace (Teams Subscription)
With a Team subscriptions you will have access to Geneious Cloud Shared workspace which makes it easy to collaborate and share data with your colleagues and centralize your data in one location.
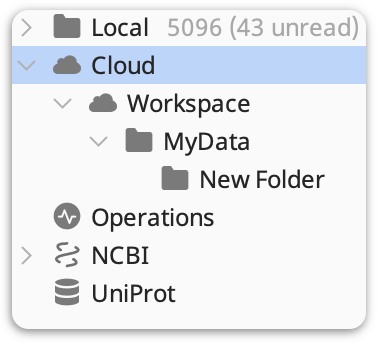
Users invited to the Team license are automatically logged in to the cloud workspace when they activate their license for the first time. They will see all folders that have been shared with them and a data folder with their USER NAME under Cloud > Workspace which is private by default.
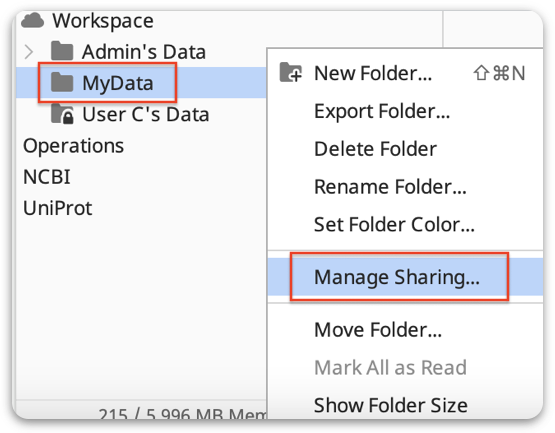
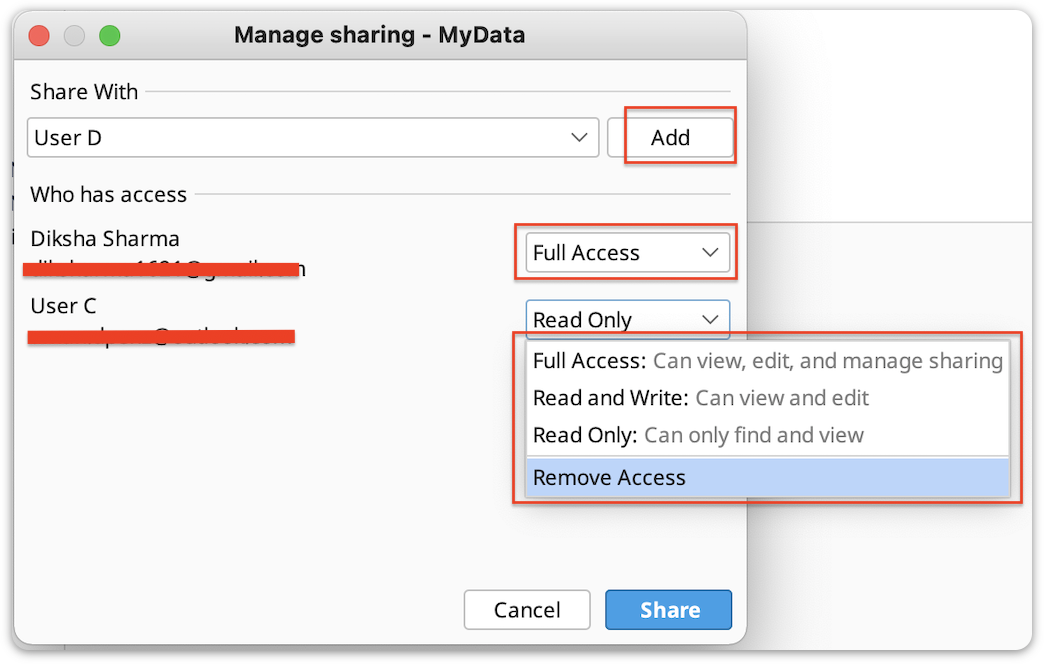
Individual users can create new folders directly under the Workspace and control who has access to them. Folder permissions can only be set on top-level folders. Any subfolders will automatically inherit the same permissions as their parent folder and cannot be configured separately. To manage sharing users can set permissions for their folders using the Manage Sharing option by right clicking on the folder and adding users from the drop-down menu to grant permissions.
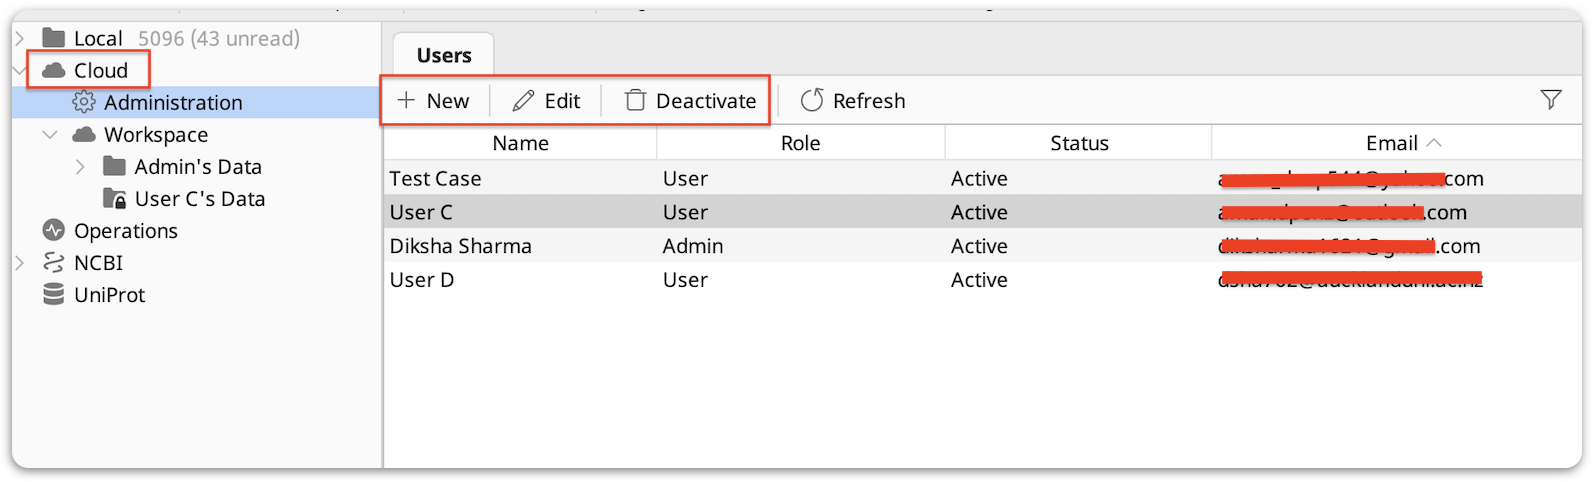
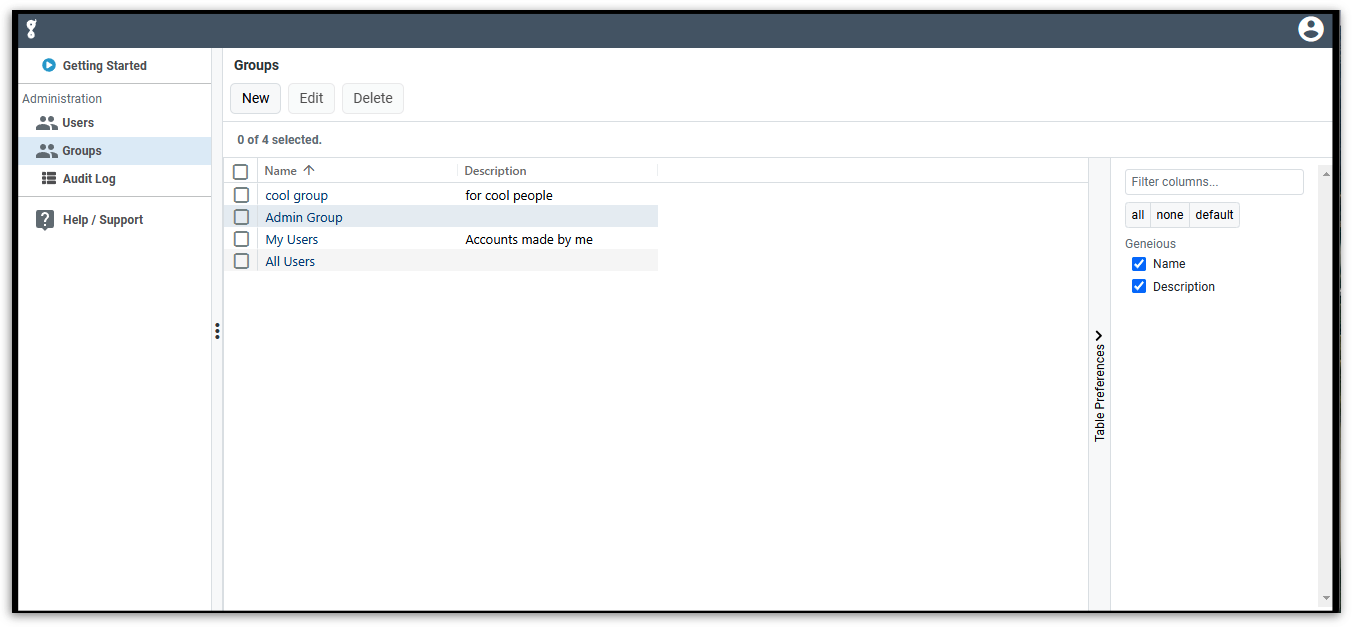
Admins can see an additional Administration section under Cloud from where they can access the workspace administration on web. Here admins can manage the users with the options to add, edit & deactivate users from the workspace and create/manage sharing groups. See this article for more information.

Admin-only Role
If you would like to assign a cloud administrator who does not use the application, you can assign a new user with the role “Admin-only” via the web portal: https://app.geneious.eu. This user will have full admin rights from the portal, without taking up the license seats.
Import Data into Geneious Cloud
Data can be imported into Geneious Cloud via either of your preferred method (drag and drop, using Add in the toolbar, or using File → Import in the menu) into the MyData folder or create a new folder to import data in. Data cannot be directly imported into ☁️ Cloud or ☁️ Workspace.
Backing up Data
Though data in Geneious Cloud is stored securely on cloud, it is recommended that you keep a backup of your Geneious Cloud. To make a backup, you can either keep a copy of your data in your Local database folder or export Geneious Cloud folders in geneious format. See this article for further information.
Deleting Data and Deleting Items folder
When a folder or document is deleted from Geneious Cloud, it is moved to the Deleted Items folder in Geneious Cloud rather than erased immediately. This means the data can be recovered if it was deleted by mistake. Pressing the Delete key is the easiest way to move the selected folder or documents to the Deleted Items folder.
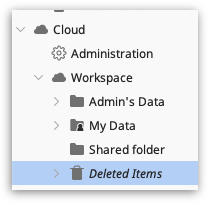
To recover documents or folders from Deleted Items you can either drag and drop them to another folder or right click and choose Restore from Deleted Items (or Put Back from Deleted Items on Mac OS) to automatically move them to folder they were deleted from.
To delete documents permanently, select Delete Documents Permanently... in the File menu or press Shift-Delete.

Please Note - Data from items from the Deleted Items folder will be permanently deleted after 30 days (from the day of deletion) and cannot be recovered.**